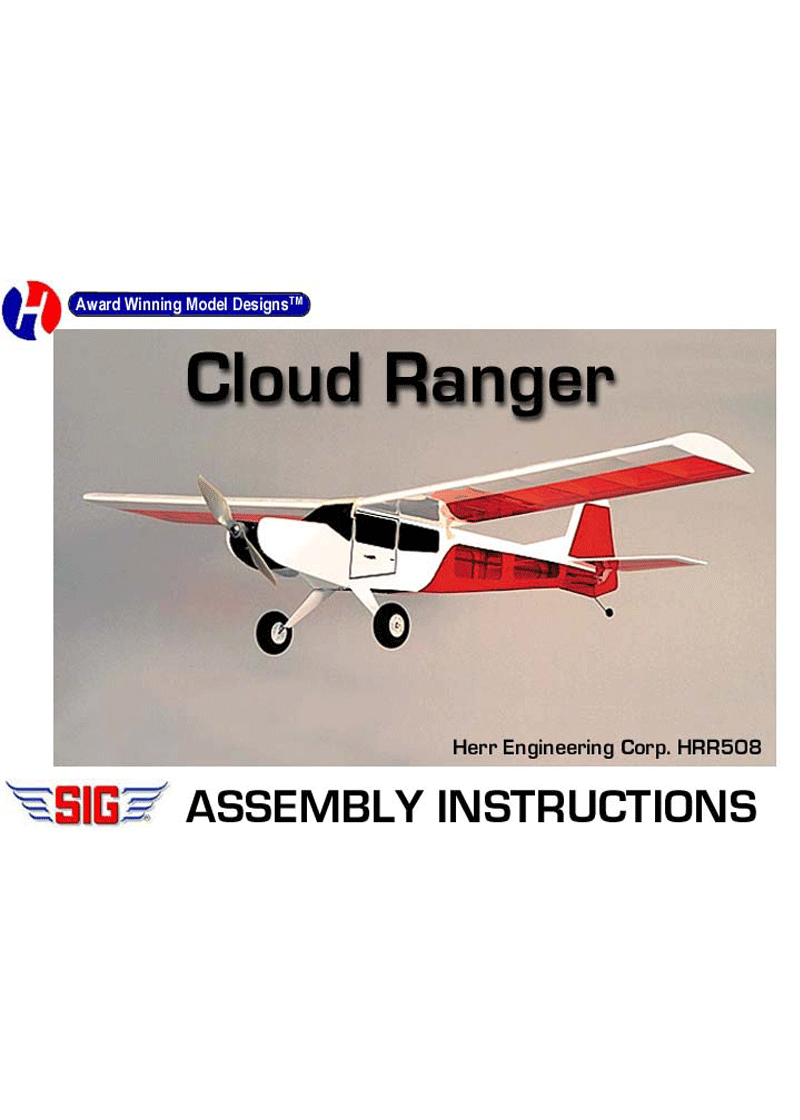
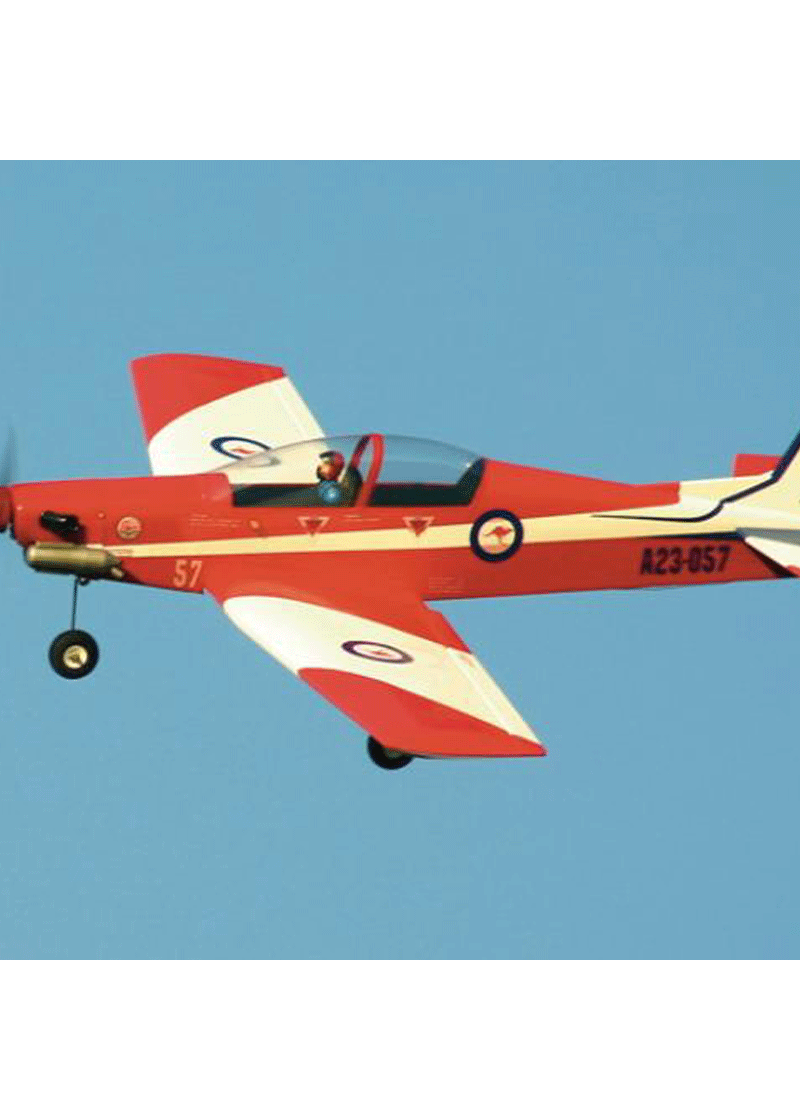
SIG Cloud Ranger Kit
Out of stock
Big 42″ Wingspan
$155.00
Out of stock
CompareYour kit contains the following parts. Please check your kit for any missing or damaged parts before starting construction.
COMPLETE KIT PARTS LIST
Wood Bag:
1
LC-508-01
3/32x4x24 Laser Cut Balsa Sheet
1
LC-508-02
3/32x4x24 Laser Cut Balsa Sheet
1
LC-508-03
3/32x4x24 Laser Cut Balsa Sheet
1
LC-508-04
3/32x4x24 Laser Cut Balsa Sheet
1
LC-508-05
3/32x4x24 Laser Cut Balsa Sheet
1
LC-508-06
3/32x4x18 Laser Cut Balsa Sheet
1
LC-508-07
1/8x4x18 Laser Cut Balsa Sheet
1
LC-508-08
1/8x4x18 Laser Cut Balsa Sheet
1
LC-508-09
3mmx4x24 Laser Cut Poplar Ply Sheet
1
LC-508-10
1/16x4x5 Laser Cut Birch Ply Sheet
6
Leading Edge and Spars
1/4 sq.x24 Balsa Strip
4
Leading Edge Stringers
1/8 sq.x24 Balsa Strip
1
Wing Tips
3/4 Balsa Trianglex14
4
Trailing Edge
1/16x1x24 Balsa Sheet
4
Center Section Sheet
1/16x3x12 Balsa Sheet
1
Hatch Support & Servo Rails
1/4 sq.x12 Spruce
2
Control Surface Pushrod
1/16×18 Wire, Threaded One End
1
F-10 Braces
3/32×1/4×6 Balsa Strip
2
Ailerons
1/8x1x24 Balsa
Misc. Parts Loose in Box:
1
Plan Sheet #1
1
Plan Sheet #2
1
Instruction Book
2
Main Landing Gear 7 1/2
Hardware Bag:
2
Control Horn
Small Nylon Control Horn
4
Horn Screw
2-56×3/8 Machine Screw
1
Elevator Joiner
1/8×3 Birch Dowel
5
Main Landing Gear and Hatch Screw
#2 Sheet Metal Screw
2
Nylon Clevis
Small Nylon Clevis
2
Wing Dowels
3/16×3 1/2 Dowels
1
Tail Wheel Wire
1/16 dia.x3 Music Wire
Note: If you are building your Cloud ranger with the optional ailerons, you will need to supply the control horns and pushrods.
The first thing that you need to do is to identify and mark the part numbers on the laser cut parts using the drawings on the following pages as a guide.
It is possible that several of the laser cut parts may not be completely cut through. If this is the case you can free the part from the sheet quickly using an X-acto knife.
NOTE: The slight discoloration on the edges of the laser cut parts may be removed by lightly sanding the edges with 400 grit sandpaper.
Additional Items Required
(Not Included in Kit)
Note: These are parts that we have used and are familiar with. There are many other brands available and you may substitute other items that you are more comfortable with or have on hand.
1
Engine
.049 to .061 Engine with throttle or Speed 400 Electric Power system
1
Radio
3 or 4 Channel Radio with Mini servos (ailerons require 2 servos)
3
Hinges
Sig Easy Hinges #SH-710 or Du-Bro Kwik Hinge #537
2
Yellow Covering Material
2 Rolls Iron on covering material
2
3/32 Wheel Collars
Sig #SH-585 or Du-Bro #138
1
1/16 Wheel Collar
Sig #SH-584 or Du-Bro #137
2
Main Wheels
2 1/4 Du-Bro #225T
1
Tail Wheel
3/4 Sullivan #351 T1 Tail Wheel
2
Wheel Bushings
Make from K&S Brass Tube #127
For Glow Power you will also need the following items:
1
Throttle Pushrod Assembly
Sig #SH-559 or Du-Bro #165
1
Motor Mount
Dave Brown #0506
4
Motor Mount Screws
4-40 x 3/4 Machine Screws and Blind Nuts Sig #SH-111 or Du-Bro #129
1
Fuel Tank
Sullivan 2oz. #SS-2
1
1/2-A Fuel Line
Sig #SH-288 or Du-Bro #221
1
Propeller
Grish Tornado 6-3 Nylon Propeller #GRIQ1050
We offer a complete Speed 400 electric power system that is factory matched to this airplane. See the enclosed flyer or contact us at the factory for further information.
General Note: Cover the plans with wax paper before assembling your model to prevent the parts from sticking to the plan.
Building the Tail Surfaces
1.
Join R-1 and R-2 together over the plan. Temporarily hinge the rudder (R-3) to the fin. Do not glue the hinges at this time. Bend the tail wheel wire to shape and glue it into position into the bottom of the rudder.
2.
Join the elevators using the 1/8″ dowel. Use the plan and the stabilizer as a guide. Trim the dowel as required to achieve the proper length.
3.
Temporarily hinge the elevators to the stabilizer. Do not glue the hinges at this time.
4.
Sand the tail surfaces smooth and round all of the edges except the bottom edge of the fin.
Building the Fuselage
5.
Assemble the left fuselage side (F-1). Glue parts F-1A, F-1B, F-1C, F-2 and F-3 together as shown on the plan. Parts F-2 and F-3 are glued on the inside of the fuselage. Parts F-2 are marked with an L or R for the left and right side. Be sure to make a left and a right side.

